CSS Animation :- It is very simple to add animation with CSS style straight from WordPress themes. There are a plethora of WordPress websites where you can find animated design elements either on the entire web page or individual parts. It is especially popular in single-page sites that often offer to buy any product. A beautiful animation and pixel perfect design support to attract the attention of users.
CSS Animation

CSS animation helps to animate anything from plain text to entire box. It grabs the user attention and animate product features or calls to action button. There are multiple websites which use CSS animation down the web page as the user scrolls the page. It adds a story-telling element to the page. It is beneficial to use CSS animation because it is faster than videos or Flash. This provides an opportunity to load quickly and supports modern browsers.
Recommended:
Best Tutorials on SVG and CSS3 Animation
The 5 Best CSS Frameworks for Web Designers
One can also add CSS animation into WordPress theme manually. Now let’s see how you can easily add CSS animations to your WordPress site.
An Introduction to CSS Animation
Over the years of formation, CSS has brought an amazing collection of animation in responsive web designing. Some time back, the animations, required Adobe Flash or another coding language, but now it is possible with HTML & CSS. Multiple browsers support it and have a higher web standard.
Here are some reasons why to use CSS Animation.
– It loads faster without putting extra strain on the website thus resulting in improved website speed.
– It is multi-browser supportable.
– CSS animation plugin can easily be integrated into all the WordPress themes.
Firstly let’s see how CSS animations can be added without writing a code
It is not always necessary to write a long code to add CSS Animation. One can manually add CSS animation to the website’s child theme’s CSS file. However, webmasters are often against in making changes in their theme’s file or spend time on getting familiar with CSS. It is an ideal way to avoid messing with any code on the website, and to integrate animations in your website.
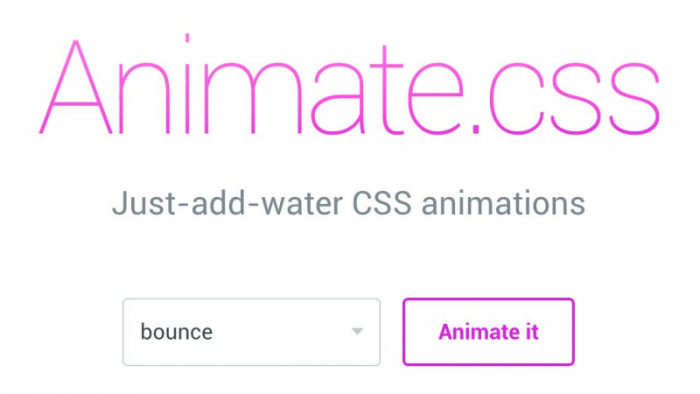
The best way to integrate animation into your website is via using Animate it. To find the plugin open your plugin page and click on “add new” option. Get started to download and install the plugin. The major advantage of using this plugin is that it does not require any configuration in the settings to use it. Once installed, you can use add animations according to your requirement.
How to use Animate It Plugin?

Animate It! is a popular WordPress plugin which allows adding CSS animations in the WordPress pages and post. It had more than 10,000 installs and loved by its users. You can now judge its popularity!
The plugin is adorned with incredible features. Some of its highlights are:
– Provides multiple-choice to use the animation in different CSS styles
– Offers more than 50 animation effects
– Adds animation to the posts and pages
– The plugin is also capable of adding distinct scrolling effects and apply animation on a scroll, hover and click.
How to Install it!
To install Animate it!; log in to your WordPress Dashboard and then move to the Plugins > Add New. Enter Animate it! in the “Add plugin” page. You will find the right result in the search box. Then click on the “Install Now” and activate it upon installation.
How to Add CSS Animations in WordPress Posts and Pages
Now that you’re completed with the plugin download and activation, we just need to add CSS Animations. It does not require any special settings. The user can add CSS animations to a new page, post, and widgets with the use of a visual editor. It can be done by just creating a new page or post, and a new icon. It can be added to the visual editor.

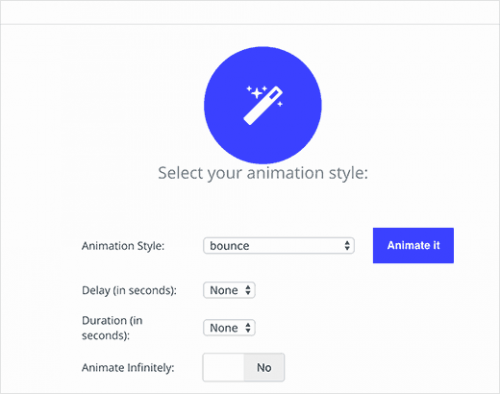
You may click on the icon, to view the customization of your CSS animation. A popup page will appear from which you may select an animation style from the drop down list. You will have a variety of options including flash, pulse, bounce, etc. Now specify the time for delay in animation style in seconds.
After adding animation, you may scroll and check them via three options. They can be Click, Hover, and Scroll. After completed with the setting, you may “Animate it!” and click to see the preview of the animation. You may also add animations to your WordPress post or page by clicking on the “Inset” button. Now you will find that there is a shortcode with a simple dummy text in the post editor. One may delete the dummy content inside the shortcode, and replace it with anything you want; it can be animation, content or image.
Conclusion
I hope this article will certainly help you how to add CSS animations in WordPress. They are easy to implement and add spark to your WordPress website. But avoid overcrowding your website with animations. It may look cluttered and unclean. CSS is the best way to bring your website to life provided you understand well how to use it.
Author Bio:
Sophia Phillips has been working as a professional in custom WordPress theme development company and loves sharing information about leveraging multiple benefits of WordPress in the best possible manner. Currently, she has an impressive count of WP- related articles under her name.
