For gamers, recording gameplay on Windows is essential to improve their skills, share the highlights, and make tutorial videos for YouTube, Facebook, Twitter, and more social platforms. The most vital key to recording gameplay on Windows 10/11 is keeping high quality and smoothness.
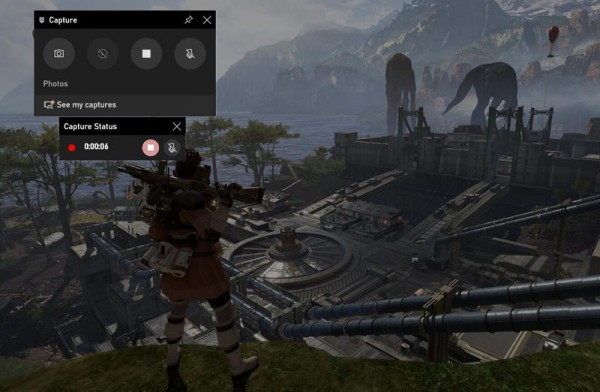
You may have known that pressing the Windows + G button can simply run the default Xbox Game Bar to record the screen on Windows. However, it only supports capturing the whole screen instead of a fixed game window, and you can’t adjust the quality, output format, frame rate, and other parameters. Keep reading and learn about the powerful game recorder with editing functions in the following!
The All-in-one Tool to Record Gameplay on Windows 10/11 with High Quality
AnyRec Screen Recorder is a powerful screen recorder for Windows and Mac. It provides a designed game recorder for you to capture any gameplay with audio and webcam. Without watermarks or quality loss, you can use it to record gameplay on Windows smoothly and upload high-quality game videos on the Internet.
- Simple UI for beginners and professionals to record gameplay with easy clicks.
- Automatically recognize the game window and capture the desired one only.
- Provide 60fps and 1080p resolution to record gameplay with lossless quality.
- Directly upload the gameplay recordings on YouTube, Facebook, Twitter, etc.
The detailed steps to record gameplay on Windows 10/11:
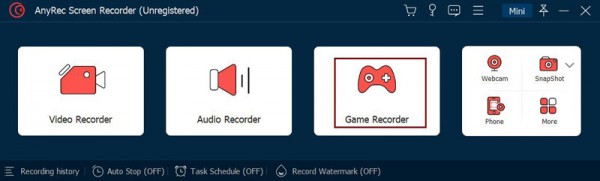
Step 1: Choose Game Recorder
Download AnyRec Screen Recorder on your Windows 10/11 and launch it. Click the Game Recorder button on the main interface, and you need to open the administrator privileges to start.
Step 2: Start Your Game
If you want to record online/offline games on your computer, you can directly open the browser or run the games on Windows 10/11. As for Switch, Xbox, and PS5 games, you need to connect your device to the computer via capture card and HDMI cables.
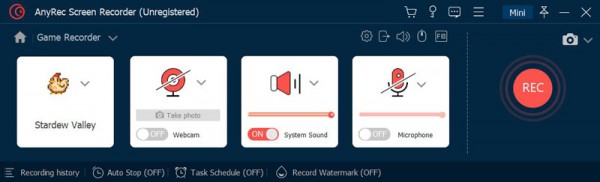
Then, you can click the downward arrow to choose the desired game window to capture. In this way, the recorded window is fixed and other programs or pop-up windows will not influence the recording process.
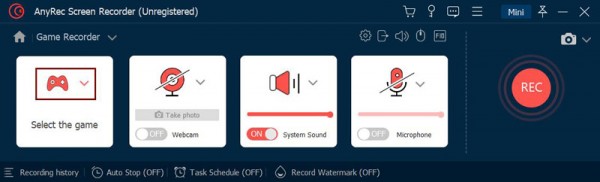
Step 3: Adjust the Recording Settings
Generally speaking, you need to turn on the system sound and microphone to record gameplay on Windows with your voice, especially when you are creating gameplay commentary. You can also run the webcam to capture yourself with the desired size and position. Click the downward arrow beside the Microphone, and you can choose to enhance the volume and cancel the noise to improve your voice quality.
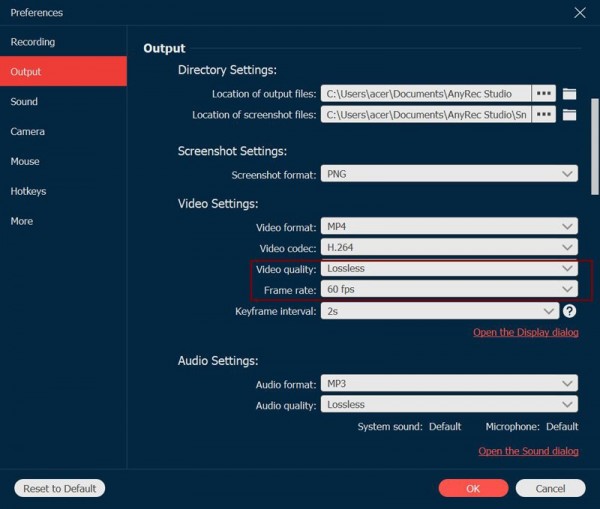
Step 4: Customize the Output Parameters
Click the Menu icon and choose the Preferences option. Then, you can click the Output tab and change the video and audio format according to your need. To keep the high quality, you can adjust the quality to the Lossless option, which will also enlarge the file size. What’s more, you’d better change the frame rate to 60fps to record gameplay on Windows smoothly.
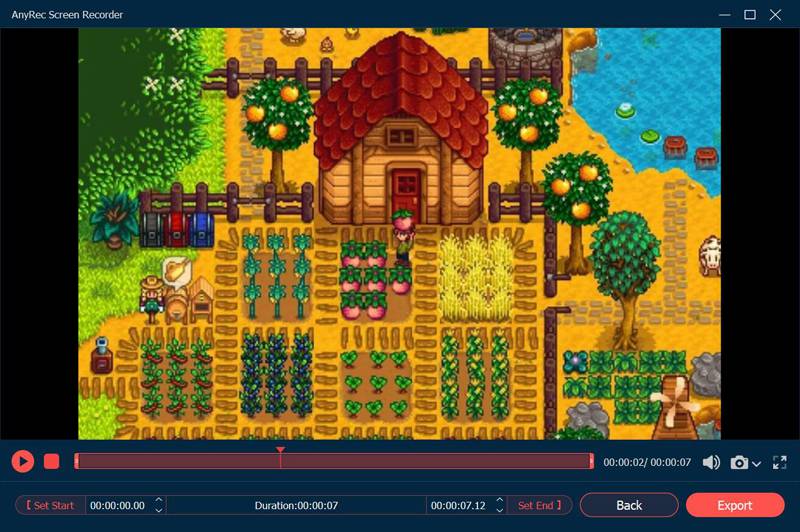
Step 5: Start and Stop Recording
After saving the settings, click the REC button to record gameplay on Windows 10/11 with high quality. Then, a toolbox will pop up, and you can add annotations and take screenshots. If you want to finish the recording, just click the Stop icon, and the recording will be automatically saved to the destination.
More Features about AnyRec Screen Recorder for Recording Gameplay on Windows
You have known that AnyRec Screen Recorder is such a versatile tool for game recording. There are more features to help you easily record LoL games, CSGO, Minecraft, and games on other consoles. The following auxiliary functions are also essential for recording gameplay on Windows 10/11.
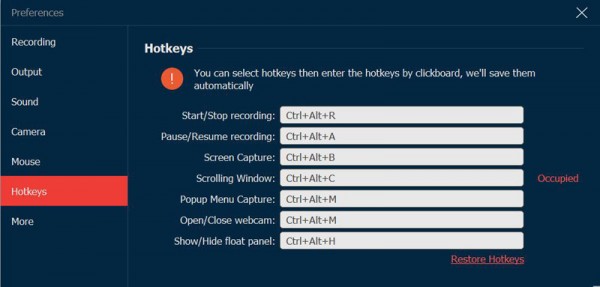
- Customized Hotkeys
Hotkeys are very important to record gameplay on Windows flexibly. Since most people play full-screen games and always choose to hide the toolbox while recording, it’s difficult to quit the game and click the Stop button to finish the recording. Thus, you can set the desired buttons on the keyboard to start/stop/pause recording at any time.
- Trim Extra Parts
The whole gameplay recordings are always several hours long, and you may need to choose the highlights to share. After recording, you can use the clipping tool to trim the recordings and only remain the wanted part. Just pull the slider to choose a certain starting and ending point. And then, you can only export the clips on your computer to save the storage space.
- Take Screenshots while Recording
When you record the entire game clearance process, you may also want to take a screenshot of the clear time getting three stars. To quickly share your achievements before uploading the whole recordings, you can simply press the Windows + Alt + C buttons to take a screenshot while recording.
Conclusion
Therefore, if you want to find an all-in-one game screen recorder to record gameplay on Windows with high quality, AnyRec Screen Recorder must be an excellent choice. Its simple user interface is suitable for everyone to use. And it’s powerful enough to keep the high quality and smoothness of your gameplay recordings. Use it to help you become a famous game YouTuber now.